Spring MVC with Bootstrap and Thymeleaf
For the first “real” post of this kind-of-blog I want to share a simple web application using Spring Boot (everyone probably must have heard about Spring Boot by now), Thymeleaf templating and Bootstrap. I hadn’t find any good example of this online so I managed to create one myself.
This application is built with Maven and that’s what I’ll use as an example here.
So, firstly, after setting up the new Maven application, we’ll have to make some changes to the pom.xml file.
As a Spring Boot application we’re going to have to add the following as a parent:
<parent>
    <groupId>org.springframework.boot</groupId>
    <artifactId>spring-boot-starter-parent</artifactId>
    <version>1.2.1.RELEASE</version>
</parent>
As for dependencies, the following for a basic Spring Boot web application:
<dependency>
	<groupId>org.springframework.boot</groupId>
	<artifactId>spring-boot-starter-web</artifactId>
</dependency>
And for the Thymeleaf templating:
<dependency>
	<groupId>org.springframework.boot</groupId>
	<artifactId>spring-boot-starter-thymeleaf</artifactId>
</dependency>
Webjars have a nice little library packaged into a JAR file that we can add as a dependency for the Twitter Bootstrap framework. Simply adding this to the dependencies makes Bootstrap available for our project:
<dependency>
    <groupId>org.webjars</groupId>
    <artifactId>bootstrap</artifactId>
</dependency>
That’s all we’ll need for the pom.xml file. Now we should create an Application.java file to boot up the application. This is the Spring Boot’s way:
@ComponentScan
@EnableAutoConfiguration
public class Application {

    public static void main(String[] args) {
        SpringApplication.run(Application.class, args);
    }
}
We’ll then need to add a resource handler that will map requests from a given path to files in the classpath. We’ll need this to be able to refer the bootstrap files later. The resource handler should be something like this:
@Configuration
@EnableWebMvc
public class WebConfig extends WebMvcConfigurerAdapter {

    @Override
    public void addResourceHandlers(ResourceHandlerRegistry registry) {
        registry.addResourceHandler("/webjars/**").addResourceLocations("classpath:/META-INF/resources/webjars/");
    }
}
The @EnableWebMvc annotation specifies this as a Spring MVC application. By extending the WebMvcConfigurerAdapter and overriding the addResourceHandlers method, we’re able to specify that for each request to /webjars/** the location should point to the Bootstrap’s dependency location. With this configuration we are now able to refer this files in an HTML file, like the following:
<head>
    <title>JoaoDuraes' Twitter Bootstrap example</title>
    <meta name="viewport" content="width=device-width, initial-scale=1.0"> </meta>
    <!-- Bootstrap -->
    <link href="webjars/bootstrap/3.3.2/css/bootstrap.min.css" rel="stylesheet" media="screen"> </link>
</head>
<body>
    <script src="http://code.jquery.com/jquery.js"></script>
    <script src="webjars/bootstrap/3.3.2/js/bootstrap.min.js"></script>
</body>
Notice that we’re referring the bootstrap.min.css file by linking to webjars/bootstrap/3.3.2/css/bootstrap.min.css. The same thing for bootstrap.min.js.
Now it’s time for adding a Controller to our application to handle the HTTP requests from the browser. With the following code, we’re stating that all the requests to ”/” will run the helloWorld method and return a View name - “index”. We also have an optional parameter which we add to the Model, that will be accessible in the view template.
@Controller
public class HelloWorldController {
@RequestMapping("/")
public String helloWorld(@RequestParam(value = "username", required = false, defaultValue = "World") String username, Model model) {
model.addAttribute("username", username);
return "index";
}
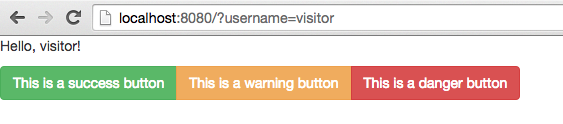
}Now, Thymeleaf parses our index.html file and evaluates the th:text expression to render the value of ${username} parameter that was set in the Controller.
<p th:text="'Hello, ' + ${username} + '!'" />For last, let’s try out some Bootstrap styling with some buttons. Just by adding the btn btn-success or similar to some buttons class will work wonders:
<div class="btn-group">
    <button type="button" class="btn btn-success">This is a success button</button>
    <button type="button" class="btn btn-warning">This is a warning button</button>
    <button type="button" class="btn btn-danger">This is a danger button</button>
</div>
Your local application should look something like this, now:
The code for this example can be found at https://github.com/joaoduraes/spring-bootstrap-thymeleaf-example.
That’s all there is to it. :)